Adjusting assignment settings
Navigating to the assignment settings
-
In your Learning Management System (LMS), launch the assignment you'd like to update. This will take you directly to the inbox.
If you forgot how to launch an assignment and get to your inbox in your LMS, check out Getting to an assignment inbox.
- In your inbox, click the gear icon on the right side of the header. This will take you to your Assignment Settings page. Your General Settings sections will be open first.
- Now, follow the next sections of this guide for help changing your...
- General Settings (such as the assignment instructions, start or due date)
- Similarity Settings (such as when students get to see their Similarity Report)
Adjusting General Settings
- With the General Settings section open, you will notice that your Assignment Title is grayed out. Don't worry! This is because once you initially create the assignment you can only update the title through the settings in your LMS, not from within the SimCheck LTI tool.
- Make any other adjustments you need to in your General Settings. Here's what these settings mean, in case you forgot:
- Instructions: These are the guidelines you'd like students to see to help them craft their submissions (2,000 character limit).
- Start Date: This is the calendar date and time you want to allow students to begin working. Students will only be able to submit once the start date and time have passed.
- Due Date: This is the calendar date and time by which students will have to submit their work. Students will not be able to submit anymore once the due date and time have passed.
- Once you’ve updated your General Settings, select the Save Settings button.
Adjusting Similarity Settings
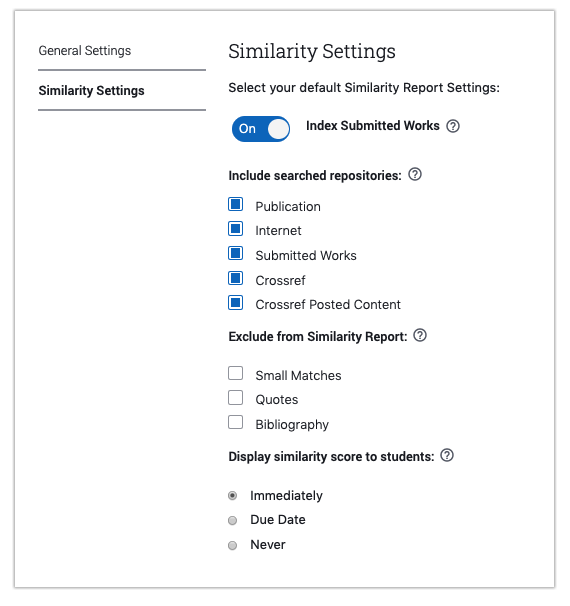
- Select Similarity Settings from the sidebar. This takes you to the Similarity Settings tab of your assignment settings panel.
-
For the Index Submitted Works toggle setting, you may or may not be able to move the toggle and change this setting based on what you administrator has chosen.
If your toggle is movable...
If your toggle is not movable...
- Keep it ON to add submissions made to this assignment to the repository or repositories of submitted works that your institution checks for similarity.
OR - Flip it OFF if you do not want to add submissions to any repositories.
You cannot choose or change this setting. Per your administrator, all submissions will be added to the repository or repositories of submitted works that your institution checks for similarity.
- Keep it ON to add submissions made to this assignment to the repository or repositories of submitted works that your institution checks for similarity.
- Under Include searched repositories, select or change the box next to each repository that you would like SimCheck to check for similarity. SimCheck will check submissions made to this assignment against every paper, article, website, etc. in the repositories you select.
-
Next, under Exclude from Similarity Report, select or change the box next to the parts of a submission that you want SimCheck to ignore as it checks for similarity. SimCheck will skip over these aspects in all submission made to this assignment as it checks for similarity.
-
Under Display similarity score to students,decide when you'd like students to be able to see their similarity score and access their Similarity Report for this assignment.
Selecting the Immediately option will allow students to access their reports as soon as they are generated.
- Selecting Due Date will only allow students to access their reports after the assignment due date has passed.
- Selecting Never means you will see students' reports, but students will not.
- When you're happy with the settings you've chosen or changed, select Save Settings.

