A Blackboard environment will only support one integration and account/sub-account. If you need to configure multiple Turnitin sub-accounts, you will have to create a Blackboard environment for each one.
If your institution uses multiple deployments of Blackboard Basic, potentially over different servers, as a standard practice you should use a separate Turnitin Account ID for each deployment, you can do this by creating sub accounts for each server or instance you use.
- Log in to Blackboard as an administrator user
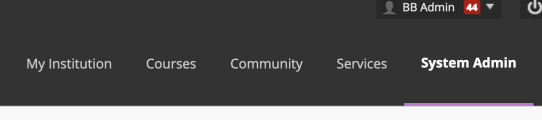
- From the administrator home page, select the System Admin tab.
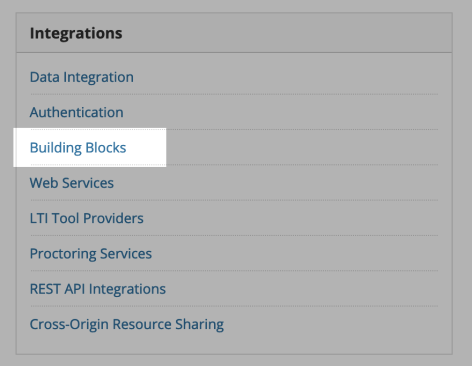
- On the System Admin page, select the Building Blocks link in the Integrations section.
-
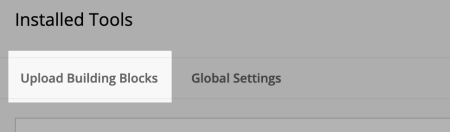
Select the Installed Tools link to view all current building blocks

- On the Installed Tools page, select the Upload Building Blocks button at the top of the page.
- Select the Browse button from the Building Block Package Section. Locate the Turnitin Building Block on your computer. Haven't downloaded it yet? Check out our integrations download page.

- Select the submit button to install the Building Block. The Turnitin Building Block will appear on the list of installed Building Blocks.
- Next, the administrator must make the Building Block available so that it can be configured. From the manage Building Blocks page, select Available using the status pull down menu next to the Turnitin Building Block.
After the Building Block is set to available and has been configured, instructors on the account can begin using the Turnitin assignment type in their courses.
If the Turnitin Building Block is removed from Available status, access to all Turnitin assignments and features for all users of the Building Block on the Blackboard installation will be disabled until the Building Block is returned to Available status.
Was this page helpful?
We're sorry to hear that.
