The class is used by the instructor to organize students and student submissions into groups. A single class may be used for multiple courses, but is typically not recommended due to the additional challenges this can create in organization. A class and its assignments are fully available to the instructor between the date of the class creation and the selected expiration date.
We recommend creating new classes each year, ensuring that inactive students from previous years are not counted against your student limit or causing an increasing build up of students which can impact the class performance.
Once a class has expired, the information and assignments in the class are viewable, but no new submissions or assignments may be made. The instructor is capable of extending the expired class to reactivate it.
New classes should be created each semester or school year when a new group of students is in a course.
- Click the Add Class button on your instructor homepage.
- On the next screen, enter the following information:
- Class name
- enrollment key
- Subject area(s) e.g. science
- Student level(s) e.g. postgraduate
Your class name should be between 2 and 100 characters long
You should not share your enrollment key publicly outside of your institution. With a Class ID and password anyone, at any institution, will be able to join your class.
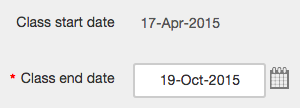
- Select the end date for the class. Once the end date has passed, the class will not be accessible for submissions unless the class is reactivated.
- Click submit to add the class. Class information will be displayed in a pop-up window containing the ID and enrollment key for confirmation.
Was this page helpful?
We're sorry to hear that.
