Creating an API scope and key
You must create a separate scope and key for every integration you create. If you have various environments in your organization, such as a development or sandbox environment, create a Scope for each of them.
Give each scope a unique name to easily identify it at a later date i.e. 'University of Turnitin Sandbox'.
- From the administrator area, select the
 Integrations tab. In this area, you'll find all of the current integrations active on the account.
 - To set up a new integration, select the Generate API Scope button in the top right.
- Name your integration and select Next.
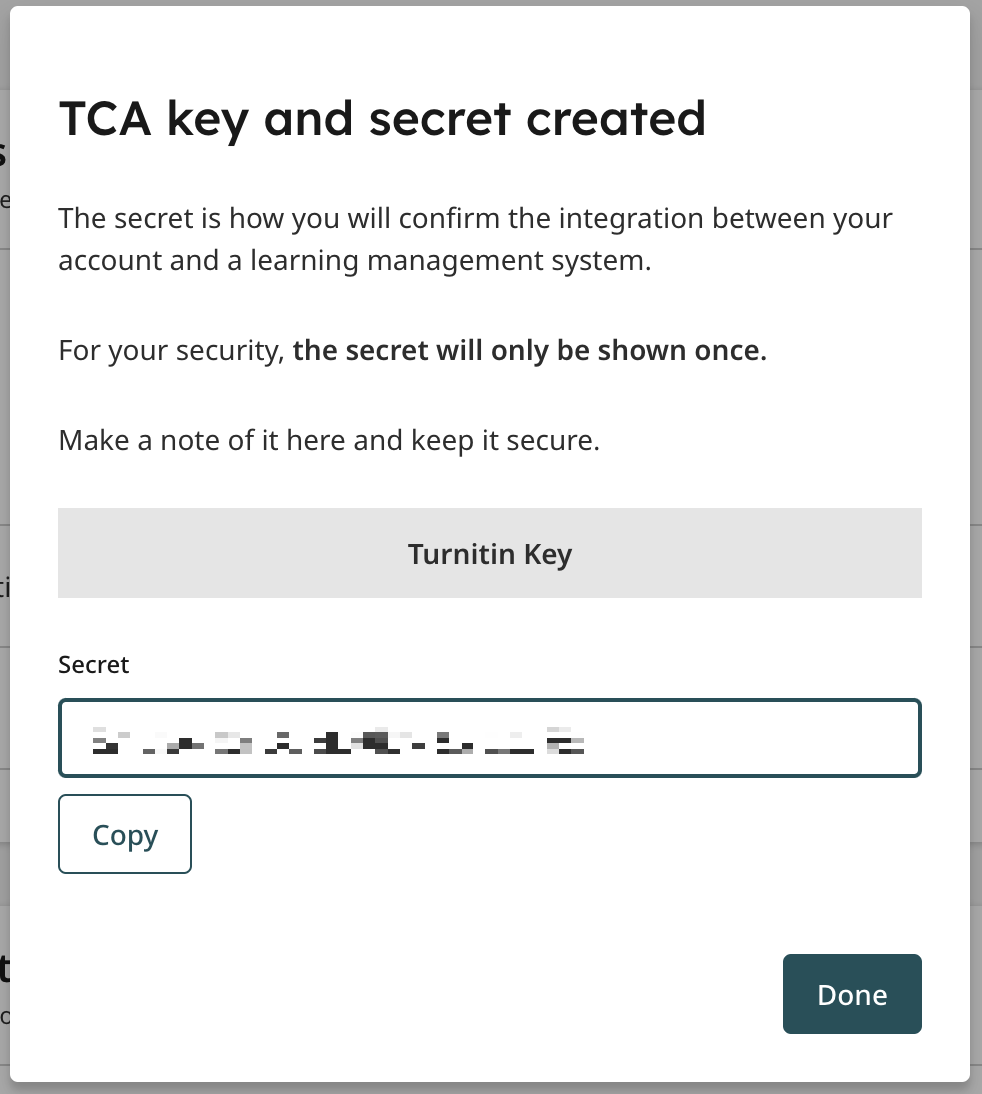
- Name your API Key and select Create and View. Another modal will appear confirming the creation of your key.
Your API key is presented in the form of a ‘Secret’. This string of alphanumeric characters is unique to your institution. You will need this ‘Secret’ to finish setting up your integration in your LMS. You will not be able to access your ‘Secret’ again so please make a note of it now
Managing existing setups
You can create multiple keys for your scope. To create more keys, select Create New Key to the right of your scope.
Once your scope has a key or keys, you can view them by selecting the arrow to the left of your scope.
You can change the status of your key using the switch.
If you turn the status of your key to ‘Off’, then you will no longer be able to set up an integration with this key. Any existing integrations using this key will no longer work while this key remains disabled.
Select the trash can to permanently delete a key.
Once you have deleted your key you cannot restore it. Any integrations you have set up using this key will no longer work.
Was this page helpful?
We're sorry to hear that.
