Using QuickMarks
QuickMarks allow you to create a library of feedback that might be applicable, on multiple occasions, to multiple students, across multiple classes and assignments.
Adding QuickMarks
Below is an overview of the different ways you can use to add QuickMarks to a paper.
- Click anywhere on the paper.
- Select the QuickMark checkbox icon from the bubble that appears.
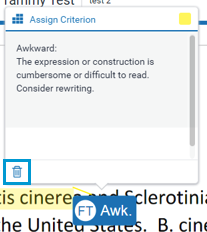
- In the next modal, you can choose which QuickMark set to access from the dropdown, and which mark in the set (in blue) you want to use.

- Highlight a section of the text you would like to associate the QuickMark with.
- Complete steps 1a and 1b above.
- The highlight color of your selected text can be changed by selecting the color square above the QuickMark explanation.
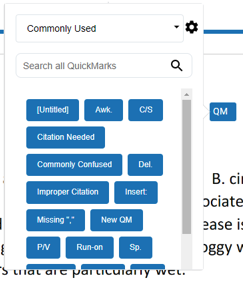
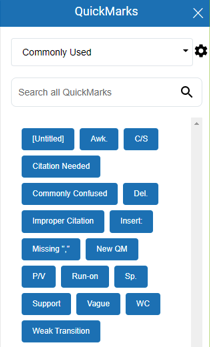
- Open the QuickMark side panel.
- To open the QuickMark side panel, click on the white box with a blue checkmark icon at the right side of the screen.
- The current QuickMark set will be displayed here. You can look for additional QuickMark sets from the dropdown. You can also use the search box at the top to find a specific QuickMark. To add a QuickMark, click and drag each mark onto the paper.
- To leave a comment alongside your QuickMark, click your QuickMark title from the paper. Scroll to the bottom of the QuickMark information and click in the Add comment field to begin typing.

- Click anywhere outside of the comment field to save your comment.
- A comment that has been added inside a QuickMark is indicated by a speech bubble alongside the QuickMark title.


The search will look at both the title and the body of the QuickMark
Deleting QuickMarks
- To delete a QuickMark, click on it to expand the QuickMark.
- Click the trash can icon in the bottom left corner of the box.
- A banner confirming your deletion will appear at the top of the paper. If you change your mind, click Undo from the banner to reinstate your QuickMark.

Was this page helpful?
We're sorry to hear that
Need to contact a human?
Get in touch