Configuring Turnitin LTI 1.3 in D2L
It takes both the D2L admin and the Turnitin admin to complete this integration. If these are two different people, be sure to have them work together so that the integration works.
Step 1 - Configure your LTI integration in Turnitin
The LTI configuration light won't show as activated on the Integration Configuration screen when you have completed the configuration. However, when you click into the Configuration Dashboard, the LTI 1.3 option will be lit green there.
The registration process for LTI 1.3 in D2L requires you to follow several steps in sequence. The steps require you to input information from Turnitin into D2L Brightspace and then fill in several fields in Turnitin with information from D2L Brightspace.
- If you are part of a global institution, log in into your Turnitin account via turnitin.com. Alternatively, log in to turnitinuk.com if you are part of a UK institution.
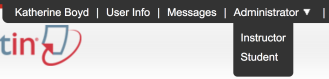
- Ensure that Administrator view is enabled from the drop-down menu at the top of the screen. If Instructor or Student is selected, please change to Administrator.
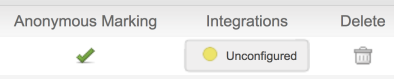
- The Unconfigured or Configured button will appear in the Integrations column on the administrator homepage.
- If an integration has already been configured, select the Configured button and continue with step 4.

- If the integration has not been configured, select the Unconfigured button and continue with step 4.
- If an integration has already been configured, select the Configured button and continue with step 4.
- Select the LTI 1.3 button to open the configuration page.
Unconfigured integrations will have an unlit status button. A yellow status button indicates a partially configured integration. A green status button indicates a fully configured integration.
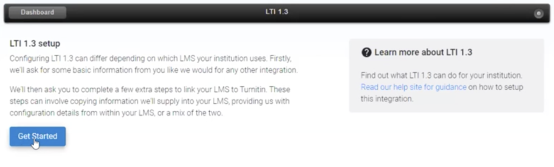
- Select the Get Started button.
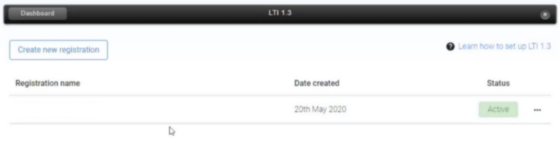
- If you already have a pre-existing LTI 1.3 registration (in another environment, for example), select the Create new registration button from the registration dashboard.
- If you already have a pre-existing LTI 1.3 registration (in another environment, for example), select the Create new registration button from the registration dashboard.
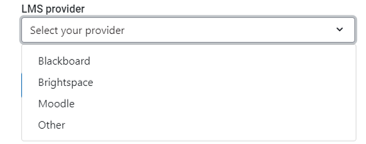
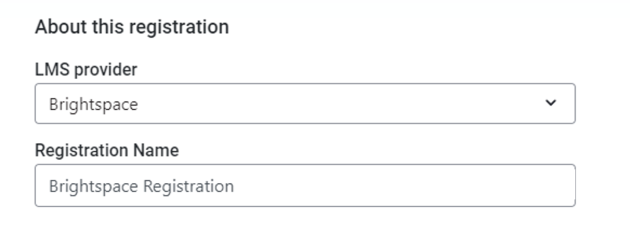
- Choose Brightspace from the dropdown.
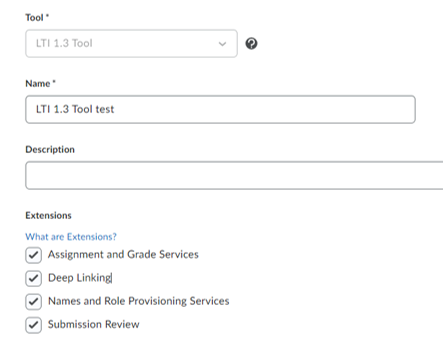
- Name your registration.
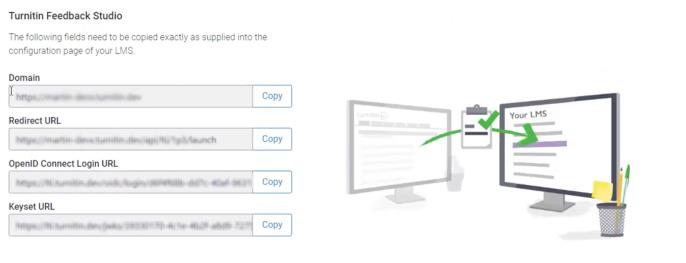
- The information that you will need to copy and paste into D2L Brightspace will auto-populate in the Turnitin Feedback Studio section. Please use the Copy button for the relevant field to guarantee it is copied correctly.
- While keeping your Turnitin tab open, open a new window or tab, and log in to Brightspace as an administrator.
- Select the gear icon, and then select the Manage Extensibility link.
-
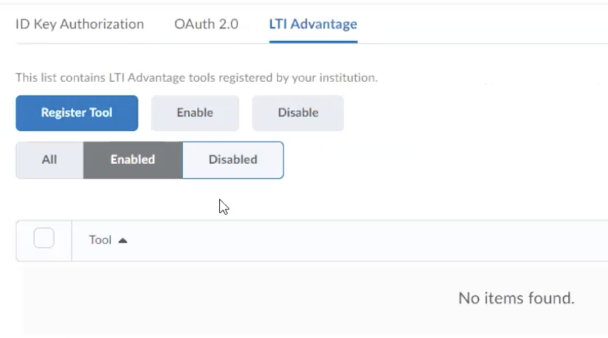
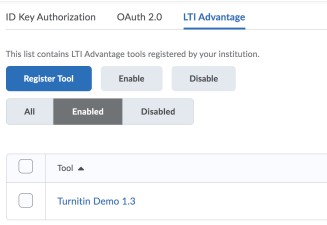
Select the LTI Advantage tab, and then select the Register Tool button.
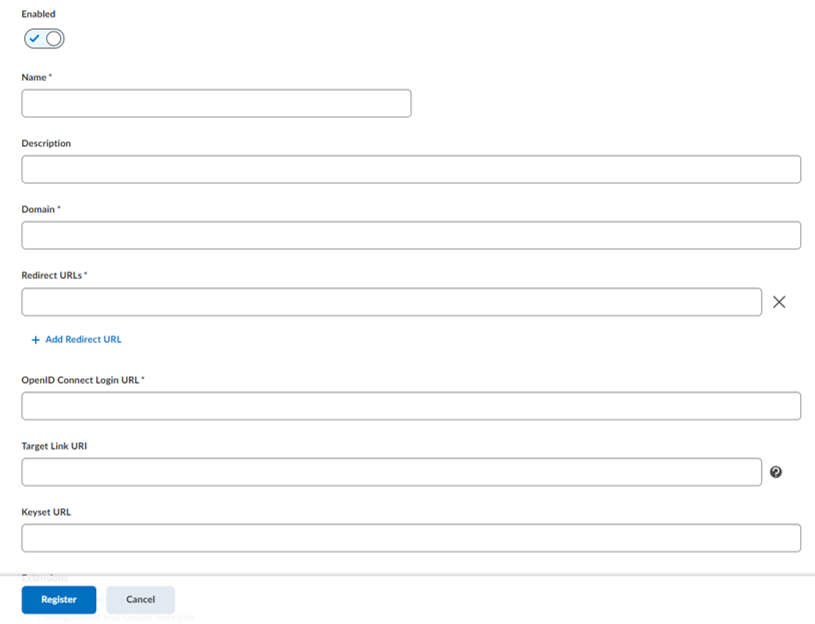
- Choose Standard registration and make sure it is Enabled.
- Give the tool registration a title. We recommend something identifiable as you'll need to remember it in later steps. You can skip the Description field.
- The following fields, Domain, Redirect URL, OpenID Connect Login URL, Keyset URL, and Target Link URI are directly mirrored in the Turnitin tab you should still have open. Use the Copy button for each field and copy them directly into the fields within Brightspace.

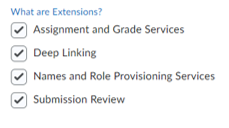
- Under the Extensions section, select the checkboxes for Assignment and Grade Services, Deep Linking, Names and Role Processing Services, and Submission Review.
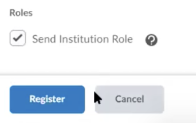
- Ensure the Send Institutional Role checkbox is selected, and then use the Register button to complete the registration in Brightspace.
- A modal will appear on the screen. Don't close this just yet, as you'll need to transfer some of the information into the Turnitin tab.
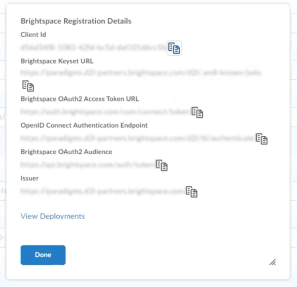
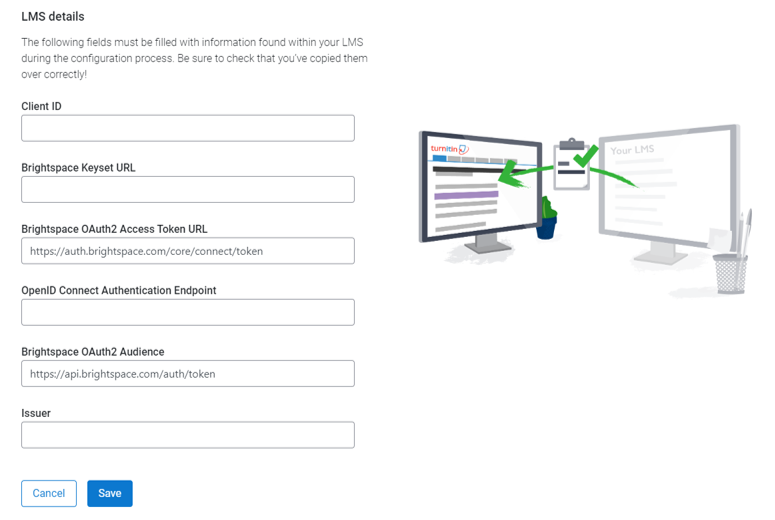
- Use the Brightspace Registration Details to fill in the mirrored fields in the LMS Details section of the Turnitin tab. These fields are Client Id, Brightspace Keyset URL, OpenID Connect Authentication Endpoint, and Issuer.
- Double-check that all the fields have been completed correctly, and then use the Save button to complete this stage of your registration.
- If successful, you'll be shown a message that you are 'Nearly there...'. To complete a registration, you'll need to create a dummy assignment to initialize the registration in our database.
Step 2 - Deploying your registration
- Navigate to the deployment page for your registration.
- The deployment page can be accessed at the end of the initially configuring the registration from the Manage Extensibility screen by selecting the View Deployments link.

- Alternatively, you can open the Manage Extensibility screen and select your recently configured registration. The link to View Deployments is found at the bottom of the edit page.
- The deployment page can be accessed at the end of the initially configuring the registration from the Manage Extensibility screen by selecting the View Deployments link.
- Select the New Deployment button.
- In the Deploy Tool, select the integration you previously configured from the Tool dropdown.
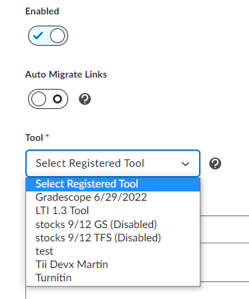
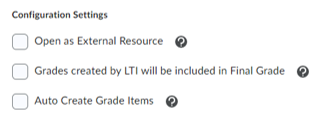
- Again, give the tool a name. This can be the same as what you set during the configuration, or you can give it a new name. Make sure all four extension checkboxes are checked.
- In the Security Settings section, select all of the checkboxes except for Anonymous.
- In the Configuration Settings section, be sure to check the box next to Grades created by LTI will be included in the Final Grade
- Add any Org Units and their Descendants that will use the tool.
If you are moving from LTI 1.1 to LTI 1.3, be sure to select the Auto-Migrate Links button.
Step 3 - Linking the registration
- Navigate to the Link page for your deployment.
- At the end of the previous step, select the link titled View Links.
- Alternatively, navigate to Manage Extensibility > LTI Advantage > [Your Tool] > View Deployments > [Your Deployment] > View Links, and select the New Link button.
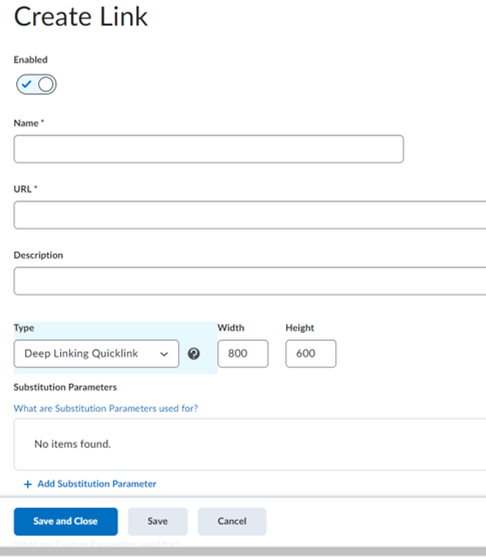
- Give the link a name. This name will be visible to instructors when opening LTI.
- Copy the relevant URL below and paste it into the URL field in D2L Brightspace:
- If you are in the US: https://api.turnitin.com/api/lti/1p3/launch
- If you are in the UK: https://api.turnitinuk.com/api/lti/1p3/launch
- Change the Type dropdown to Deep Linking QuickLink
- (Optional) You can set the height and width of the iFrame that Turnitin will load in. We recommend keeping these set to their default values.
- To complete linking the launch, use the Save and Close button.
Step 4 - Creating a dummy assignment
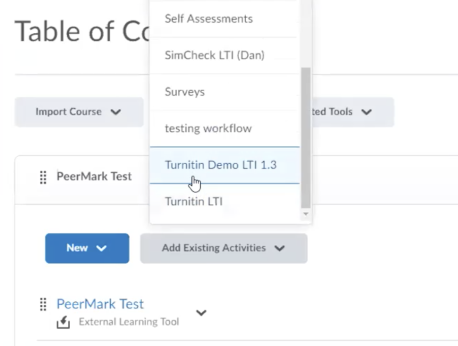
- Navigate to the course you would like to add Turnitin to.
- Select the Content tab.
- Select your registration from the Add Existing Activities button.
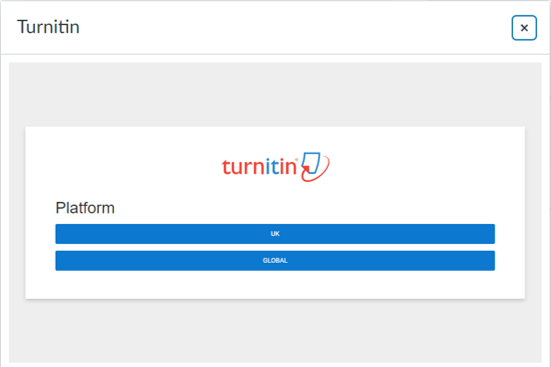
- In the new window there will be an option to connect your account to Turnitin. Choose Global if you are using Turnitin via turnitin.com, choose UK if you are using Turnitin via turnitinuk.com.
- Enter the username and password used for the Turnitin account you used to create the registration. We need this to initially authenticate the registration is genuine.
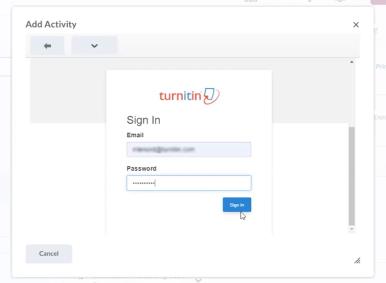
- Select the relevant account for this registration using the radio buttons. Use the Next button to continue.
- Review the content on the confirmation screen. If everything looks correct, select the Confirm and Complete button to finish your setup.
- Close the Add Activity modal.
- Repeating step 3, select your registration from the Add Existing Activities button.
- Now Turnitin will launch in the same modal as you just used to authenticate the registration.
- Add a title for the dummy assignment, set dates, and use the Submit button to complete making your dummy assignment.
- The dummy assignment can now be deleted. Your registration has been initialized.
If you are migrating from LTI 1.1 to LTI 1.3, we recommend that you link to the same account that you used for the LTI 1.1 integration.
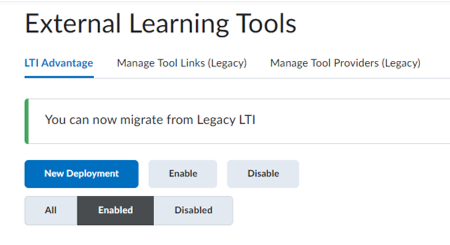
Once the LTI 1.3 integration is complete, go to External Learning Tools, Manage Tool Links (Legacy), and delete the LTI 1.1 tool link so that no new LTI 1.1 assignments can be created, but leave the Tool itself available to users so that they can access past LTI 1.1 assignments.
This is a one-time action that needs to be completed by the account administrator in order to allow use of LTI 1.3. Neither your instructors or students will be prompted for this.
If a Student Information System (SIS) changes a student’s enrollment on an LMS course to either remove them or make them inactive, this could remove the student from the Turnitin assignment. If an institution has concerns around how their SIS may work with Turnitin, they should speak to their LMS provider to learn more about how details are shared with LTI tools.
Was this page helpful?
We're sorry to hear that
Need to contact a human?
Get in touch