This integration path is no longer supported for new users. If you're looking to use LTI, configure LTI 1.3 instead.
Important Terminology
Launch URL: This will be different if you are accessing Turnitin from the United Kingdom or from if you are accessing from elsewhere. You may also know it as the Domain URL.
https://api.turnitinuk.com/api/lti/1p0/assignment (UK users only)
https://api.turnitin.com/api/lti/1p0/assignment (All other users)
Shared Secret: In Turnitin this is called the Shared Key. You create this when you configure your account in Turnitin.
Domain: Enter either turnitin.com or turnitinuk.com depending on your location.
- Log into Canvas as an administrator.
- From the left-hand side of any page within Canvas, select the Admin tab.
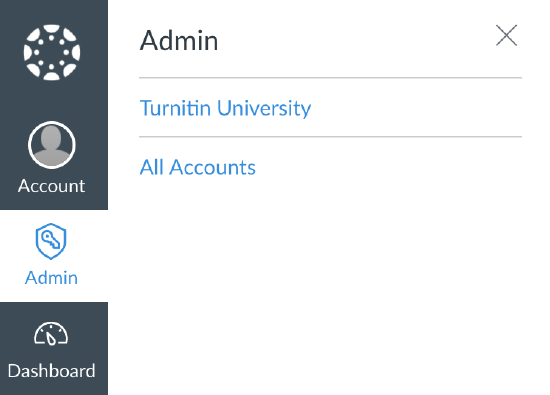
- Select the account you'd like to configure with Turnitin LTI.
- From the left-hand menu, select Settings.
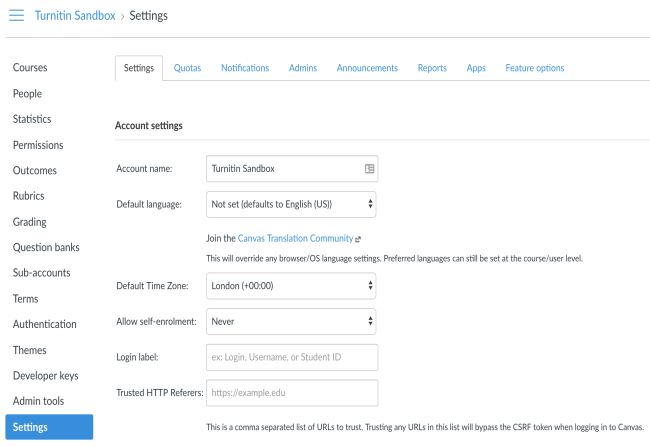
- Select the Apps tab from the top of the Settings page
- Select the View App Configurations button.
- Select the + App to bring up the Add App pop-up box; this allows you to configure your account for an LTI external app.
- Start your configuration!
a. Set the Configuration Type to Manual Entry.
b. Enter a name for your external app. (for example, Turnitin, Turnitin LTI, etc.).
c. Enter your Consumer Key. This is the three to six-digit Turnitin Account ID Number included in your Welcome to Turnitin email, and also located to the left of the Account Name in your Turnitin Administrator account.
d. Enter your Shared Secret. This is the Shared Key set by the Turnitin administrator, and is exactly 8 alphanumerical characters in length.
e. Enter one of the following launch URLs for the Turnitin paper assignment; this is based on your location:
https://api.turnitinuk.com/api/lti/1p0/assignment (UK users only)https://api.turnitin.com/api/lti/1p0/assignment (All other users)
f. Enter your Domain. This will be turnitin.com if you are part of a global institution or turnitinuk.com if you are part of a UK institution.
This is a required field if you are using the custom fields detailed in step 6h.
g. Set Privacy to Public.
The public setting is required in order to launch the Turnitin Tool and ensures that the LMS and Turnitin users are mapped correctly.
h. Enter the following variables into the Custom Fields box
custom_duedate=$Canvas.assignment.dueAt.iso8601
assignmentid=$Canvas.assignment.id
custom_submission_title=$Canvas.assignment.title
custom_maxpoints=$Canvas.assignment.pointsPossible
custom_startdate=$Canvas.assignment.unlockAt.iso8601i. (optional) If you want to enable anonymous grading enter the following variable into the Custom Fields:
anonymous_marking_enabled=$com.instructure.Assignment.anonymous_gradingFor more information about anonymous grading, check out our guidance.
j. (optional) Enter the following variable into the Custom Fields box if you prefer your Canvas user profile timezone setting to be used for how dates display in the Turnitin LTI inbox and settings:
custom_timezone=$Person.address.timezonek. Leave the Description box blank at this time.
- Select Submit at the bottom of the external tool editor to save the app.
- Once these steps are complete, instructors can begin to use Turnitin LTI by creating a new Canvas assignment. View instructor guidance for creating a Canvas Turnitin LTI assignment for further assistance.
Was this page helpful?
We're sorry to hear that.
