Customized exclusions
The customized exclusions setting allows you to exclude sections of text from the Similarity Report using customizable keywords and phrases (for example, ‘Further Acknowledgment’).
How does it work?
Customized sections work through the use of keywords and phrases. When creating a custom section, you will be asked to enter a number of starter keywords or phrases. When this section is selected for exclusion, we will look for these starter keywords or phrases in the file when a Similarity Report is generated, along with certain section qualifiers.
To qualify as a section, the keyword or phrase must come after a paragraph or empty line. A section title can have a number and full stop before it and still qualify. For example:
1. Announcing the Material
However, if the keyword or phrase is followed by a colon (:) or semicolon (;) then the section will not qualify and not be excluded from the report. For example:
Announcing the Material:
If a keyword or phrase is found, and meets the section qualifiers, we will exclude all content after this keyword or phrase up until the next paragraph break.
For example, if your custom section included the starter phrase is ‘Announcing the Material’, then the exclusion in the Similarity Report would look like this:
Excluding customized sections
You are able to exclude customized sections created for your account from appearing in a Similarity Report in your inbox settings page or from within the Similarity Report.
Customized section exclusions, and your options for them, depends on the settings that your account administrator has set at an administrative level:
If they have chosen ‘Enable Permanently’, this customized section will be excluded from the Similarity Report and you will be unable to reinclude it.
If they have chosen ‘Enable’, you will have the ability to choose whether this section is excluded or not.
If they have chosen ‘Disable’, you will be unable to exclude that particular customized section.
From the inbox settings
If your administrator has not turned on customized section exclusion for your account then the following options will not be available.
Select
 Settings from the sidebar.
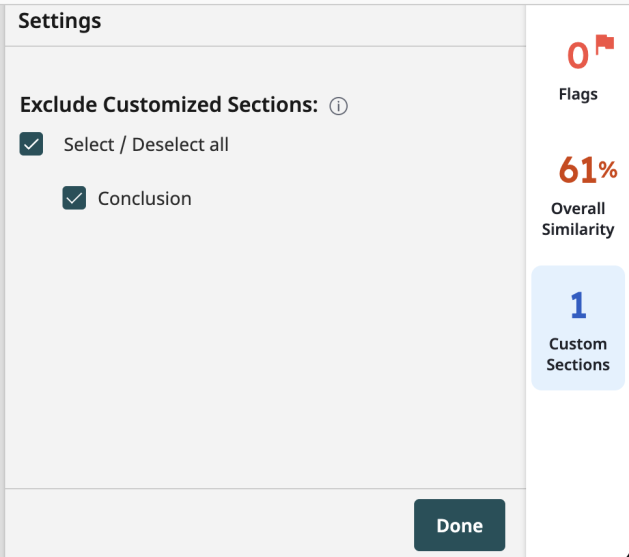
Find the Exclude Customized Sections area.
Select the box next to the section title of the customized section you would like to exclude from the Similarity Report, or select Select All to select all available customized sections.
If a section is already selected, deselect it by selecting the box next to it, or select Deselect All to deselect all available customized sections.
Changing your settings will only affect future uploads. Similarity Reports generated before changes made to the customized section settings will need to be regenerated in order to capture the new changes and exclude the correct customized sections from the Similarity Report.
In the Similarity Report
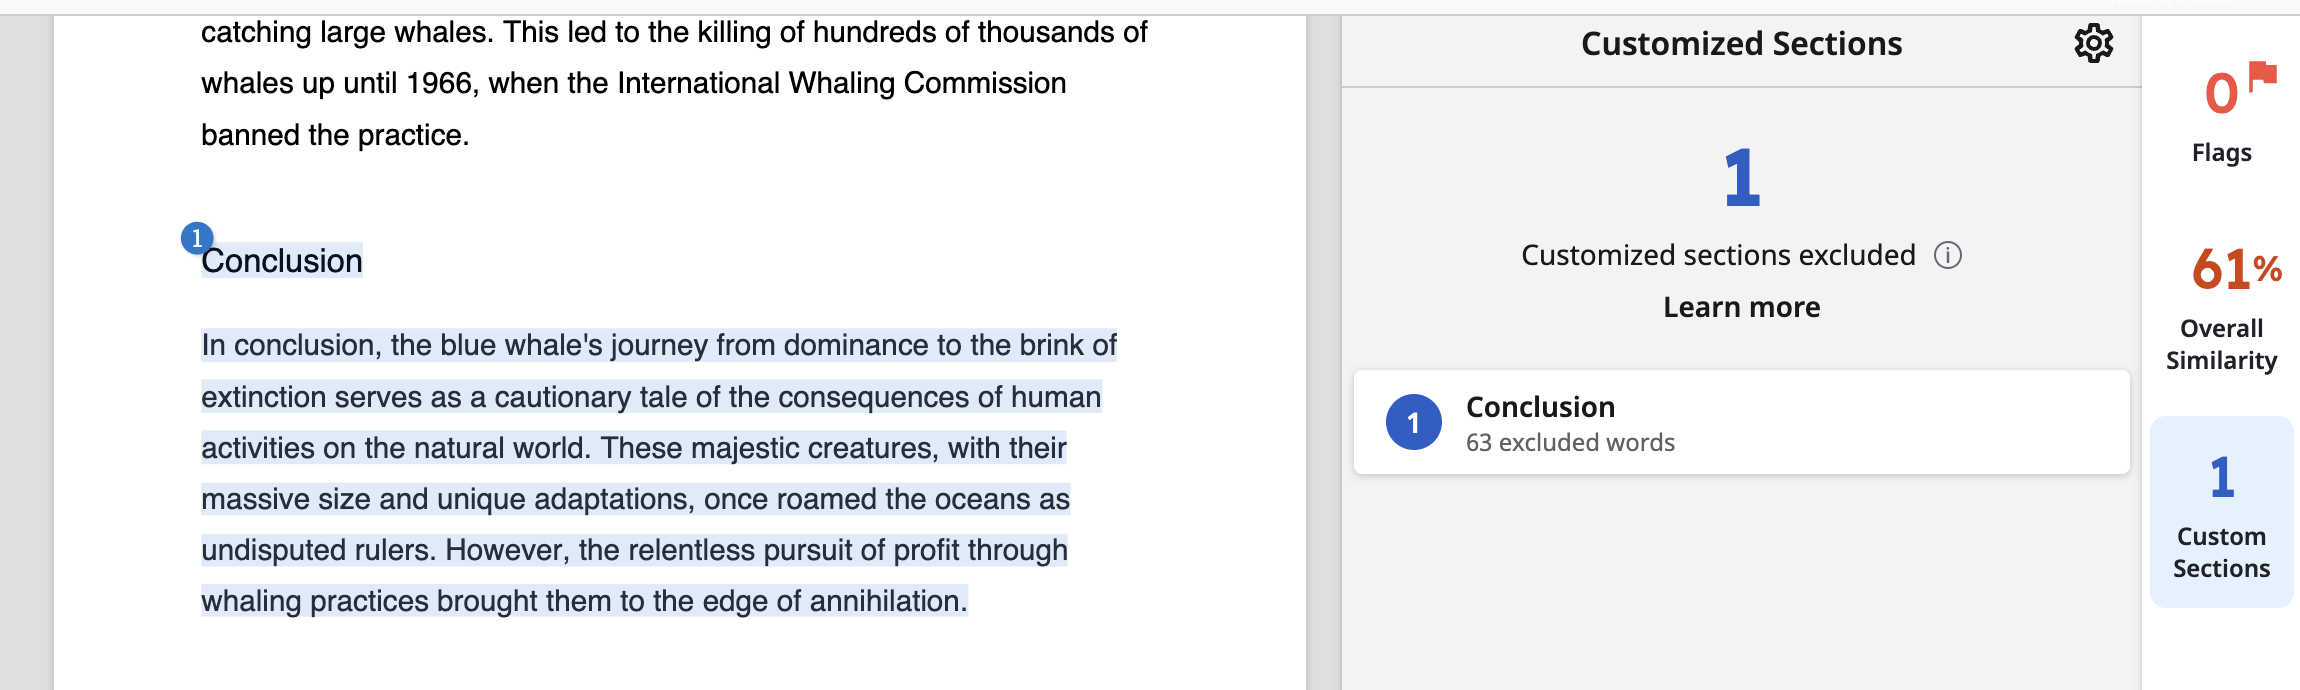
Select the Customized Section option in the Insights panel to the right of the Similarity Report.
From the Customized Section panel you will be able to see all the customized sections that have been excluded from the Similarity Report.
Select a customized section to see more details about it. This includes;
the section title,
the amount of words that have been excluded in this customized section,
the section starter that matched with content in the document,
and all the other section starters attributed to this customized section (use the dropdown to see the complete list).
To see the customized section settings in the report, select the
icon next to the Customized section header.In the customized section settings, you can select or deselect any customized setting you wish to include or uninclude from the Similarity Report.
If your account administrator has selected Enable Permanently for any customized sections in your account then this section will always be excluded from the Similarity Report and you will not be able to modify it.
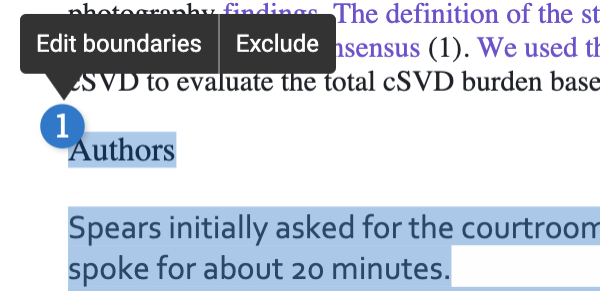
Modify custom section boundaries
Select the circled number at the start of the section and then select Edit boundaries.
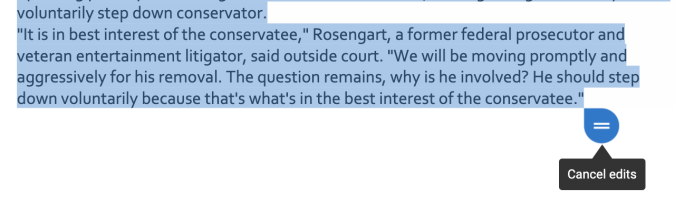
Use the tear drop slider to modify the section. If you do not want to edit this boundary, select Cancel edits.
Once you are happy with the new boundaries, select Confirm changes.
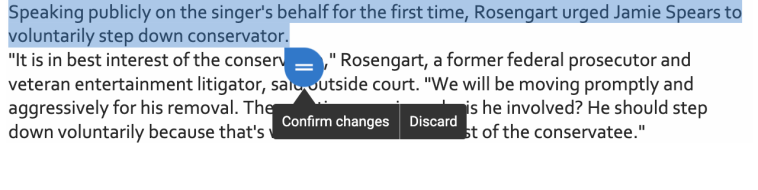
Alternatively, use the Discard option to revert the section back to its previous state.
Any sections that have been edited will be marked in the side panel.
You can undo any edits you have made to a section by selecting the circled number and then selecting Undo edits.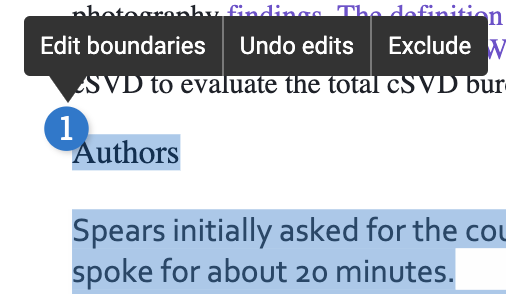
Was this page helpful?
We're sorry to hear that
If you have the time, we'd love to know how we could improve it.
The guide
