Customized exclusions
The customized exclusions setting allows administrators to create sections of text that can be excluded from the Similarity Report. Administrators can tailor these keywords and phrases to best meet the needs of their institution (for example, ‘Further Acknowledgments’).
How does it work?
Customized sections work through the use of keywords and phrases. When creating a custom section, you will be asked to enter a number of starter keywords or phrases. When this section is selected for exclusion, we will look for these starter keywords or phrases in the file when a Similarity Report is generated, along with certain section qualifiers.
To qualify as a section, the keyword or phrase must come after a paragraph or empty line. A section title can have a number and full stop before it and still qualify. For example:
1. Announcing the Material
However, if the keyword or phrase is followed by a colon (:) or semicolon (;) then the section will not qualify and not be excluded from the report. For example:
Announcing the Material:
If a keyword or phrase is found, and meets the section qualifiers, we will exclude all content after this keyword or phrase up until the next paragraph break.
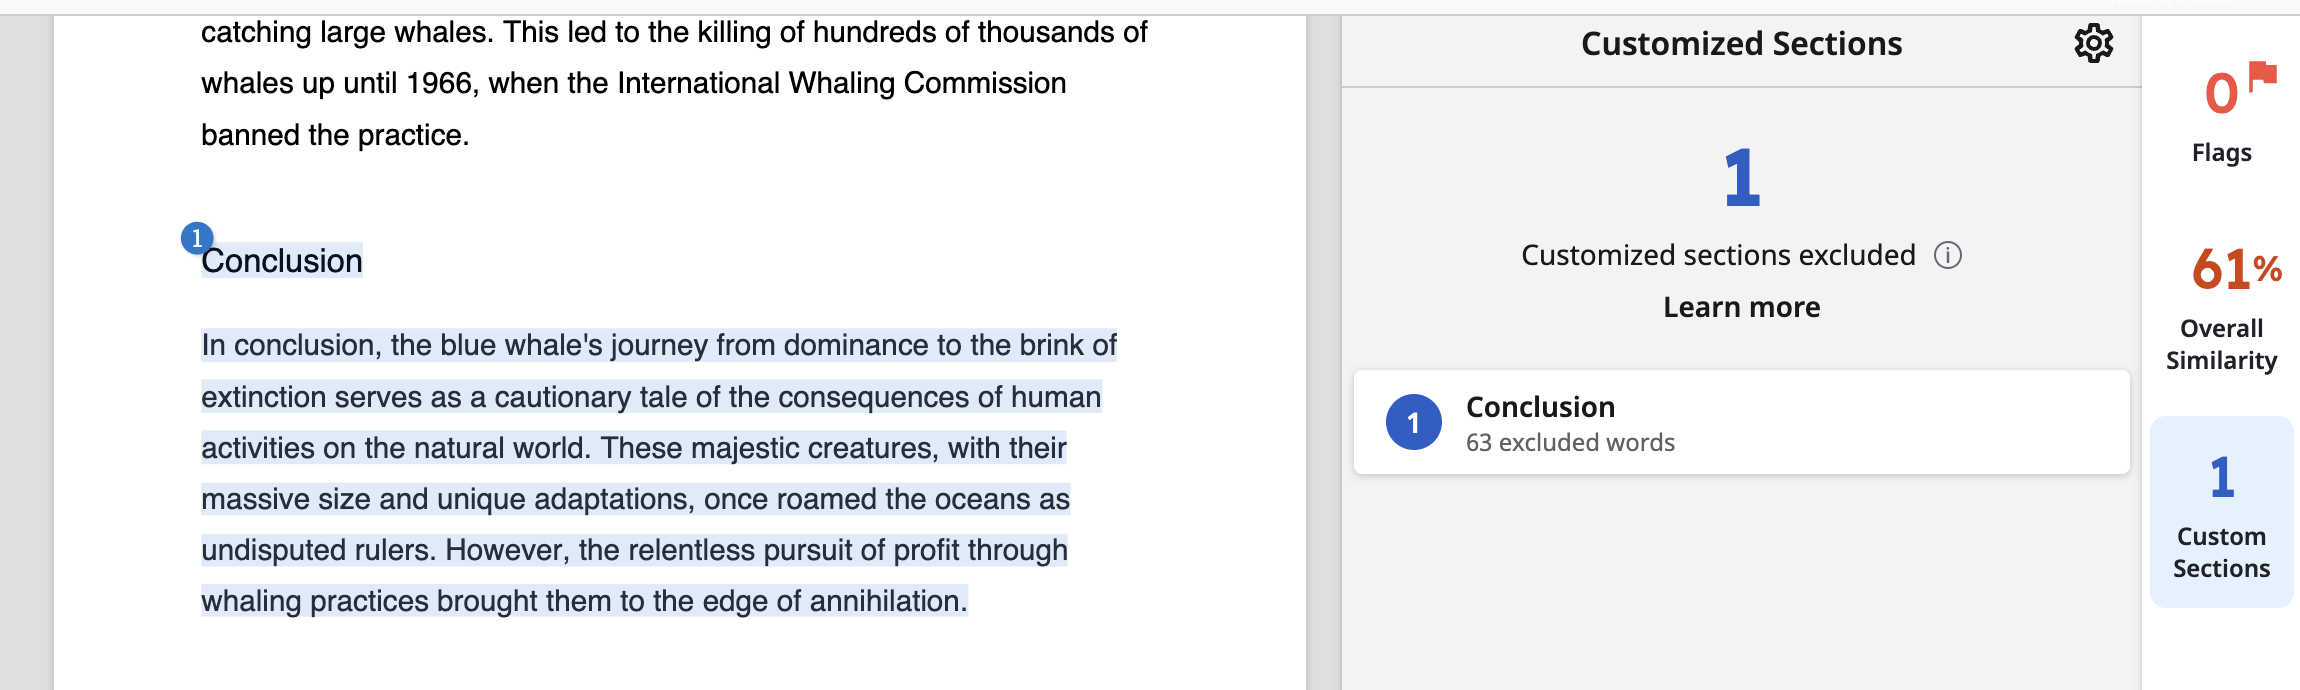
For example, if your custom section included the starter phrase ‘Announcing the Material’, then the exclusion in the Similarity Report would look like this:
Enable customized exclusions
As the administrator, you can decide if customized exclusions are enabled for you and others on your account
The option for enabling or disabling customized exclusions is available from the
 Settings page, accessible from the sidebar.
Select the Web & API tab.
From the Customized exclusions heading, you will have the option to switch this feature On or Off for your account. Only administrators can turn this feature on or off.
The default setting for customized exclusions is On. If your account uses the Turnitin Core API (TCA) and you switch this feature Off , this will need to be replicated in your API settings. This applies for all future changes.
The number of custom sections that have been created for your account will be shown beneath the On option.
Managing your accounts customized exclusions
Select the Manage our account’s customized sections link to open the Customized sections manager.
Create a new section
To create a new section, select the + Create New button to the right of the dropdown. This will open the Create customized section modal.
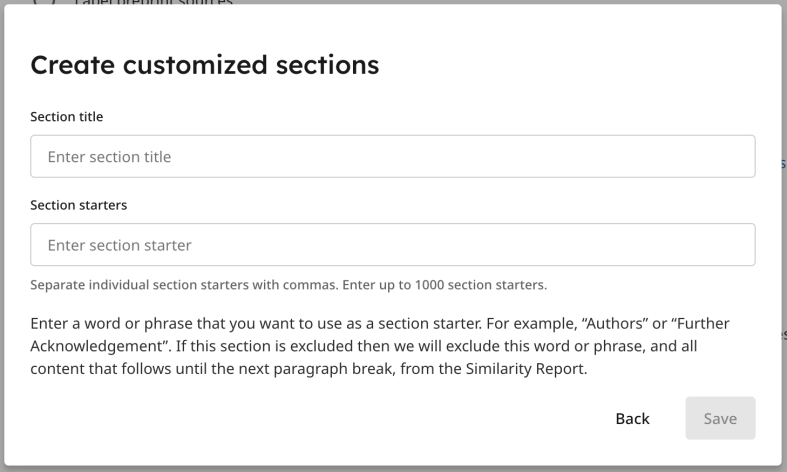
Enter a Section Title in the box provided. The section title will be used to group the keyword(s) and/or phrase(s) for this section and, if enabled, will appear in the inbox settings and Similarity Report.
The section title has no effect on the Similarity Report. It will not be used as a keyword or phrase.
The section title must be unique to your organization’s account. If a section with this title already exists, you will be unable to create the section.
Below the section title box, enter the keyword(s) and/or phrase(s) that you would like to attribute to this customized section in the Section Starter box. When this section is selected for exclusion and enabled, we will look for these starter keywords or phrases in the document when a Similarity Report is generated. If one is found, we will exclude all content after this keyword or phrase up until the next paragraph break.
You may enter up to 1000 section starters into this box, separating each with a comma.
The section starter(s) must be unique. If you enter a section title that has already been used in your organization’s account, you will be unable to create the section.
When you are happy with your section title and starters, select the Create button to create this customized section.
Adding customized sections to the list
Use the dropdown to select the sections you want to be excluded from the Similarity Report. Turnitin has already created a list of commonly used sections for you to choose from to help you get started. Alternatively, if you know the section title, begin typing to bring up all sections that match this text.
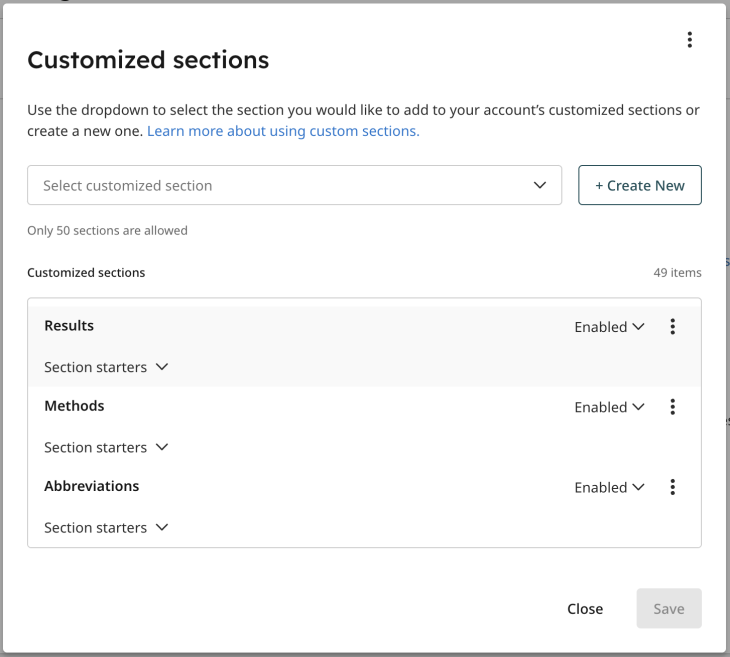
Sections that have been added to the exclusion list will be shown below the dropdown.
Enable customized sections
Once a customized section has been added to your account’s customized section list, it will appear in the Customized sections box.
You can choose what you would like to do with this section in your account by selecting the dropdown next to the section. The options are:
Disabled
This section will not be used in your account's customized sections.
Enabled
This will exclude the section from the Similarity Report. Users will be able to reinclude the section from the Similarity Report or from their account settings.
Permanently Enabled
This will exclude the section from the Similarity Report. Users will be unable to reinclude the section.
Edit or remove customized sections
To edit or remove a customized section select the three dots next to the section to open the Edit or Remove menu.
Select Edit to open the Edit Customized Section modal. From here you will be able to rename the section and add or remove keywords and phrases.
Select Remove to remove the section from the list.
Once a customized section has been removed it cannot be restored.
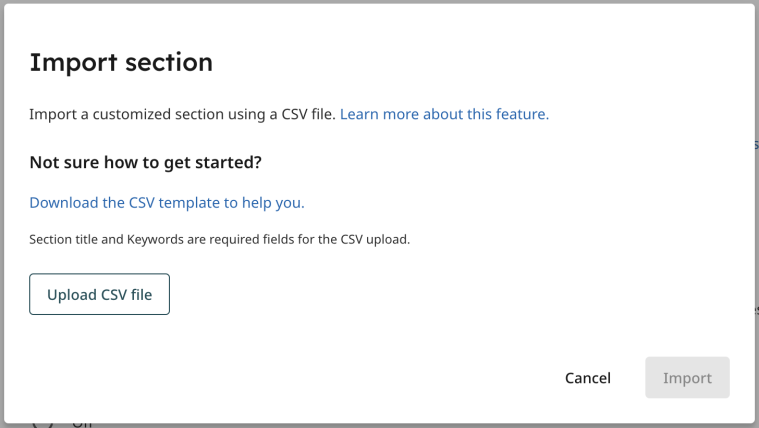
Import customized section for exclusions
To import a customized section using a CSV template, select the three dots in the Customized Section modal to open the import/save menu. Select the option Import using CSV file to open the import modal.

Upload a CSV file containing the needed information using the Upload CSV file button.
Filling out the CSV file
If you are unsure of how to lay out your CSV template, you can download a template by selecting the download link.
The CSV template contains the areas that need to be filled with section titles and section starters.
Please adhere to the rules of the CSV template:
Please do not modify the columns and lines structure of the file
Please do not include more than 1000 section starters per one section
Please do not include more than 50 section titles
Section starters must have comma-separated values
Section titles and section starters shouldn't be longer than 256 symbols
Section titles and section starters should be unique within your account
Only latin symbols and numbers are supported
If any of these rules are broken, the CSV file upload will not work or will have issues that need resolving before attempting to import it.
Confirming the Section Identifiers
Once you have uploaded your CSV file, the section identifiers will be automatically entered into the modal.
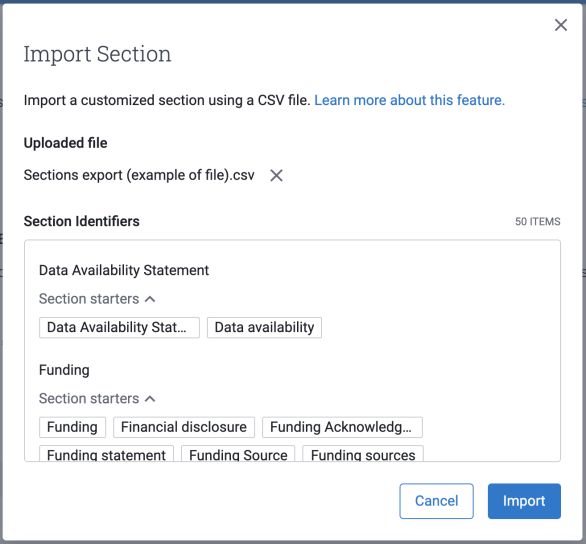
If you are happy with the Section Identifiers, select Import to create the custom section. Alternatively, select Cancel to leave without saving.
If, before you opened the import modal, you had a custom section already created but not yet saved, you will be warned that your imported section will replace the existing section.
Template issues
If there are issues with the CSV file, they will be displayed in red.

Make note of these issues and correct them in the CSV file. Please adhere to the CSV rules.
Once you have corrected the errors in the CSV file, select Close and reattempt the upload.
Export existing section template as a CSV
If you would like to save your current template and export it onto your device as a CSV file, select the three dots in the Customized Section modal to open the import/save menu.
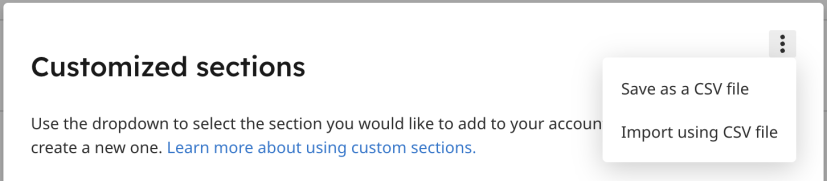
Select the option Save as CSV file to save the section to your device.
Was this page helpful?
We're sorry to hear that
If you have the time, we'd love to know how we could improve it.
The guide
